
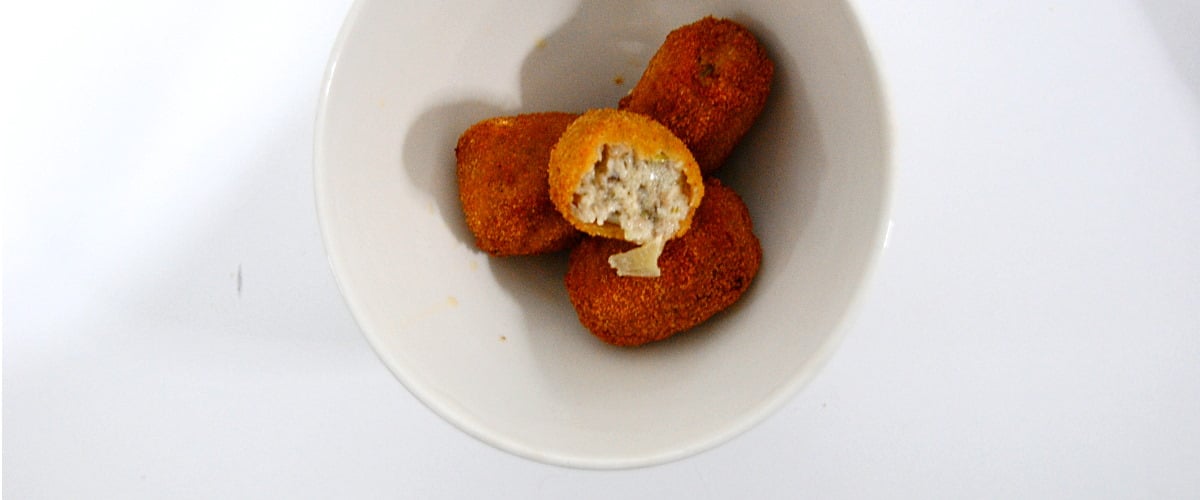
Croquettes are a good resource as a starter when having guests. They can be prepared in advance, frozen and taken out shortly before frying to serve immediately afterwards at the table. Those steps I followed with these mushroom and leek croquettes that I propose today.
If these croquettes have something, it is flavor. A flavor that I have reinforced by incorporating a "secret" ingredient into the milk: dried mushrooms. In the step by step I share with you how to use it, although you will not need to do it if you cannot find it or have it on hand when preparing them. Can we get down to business?
Mushroom and leek croquettes
The mushroom and leek croquettes that I propose today are full of flavor. Perfect as a starter when you have guests.
Author Maria
Recipe type: Entrance
Rations: 20
Preparation time:
Cooking time:
Total time:
Ingredients
- 20 g. extra virgin olive oil
- 20 g. of butter
- ½ onion, minced
- 1 leek (white part), minced
- 120 g. fresh mushrooms, chopped
- 40 g. Of flour
- 80 g. dried mushrooms, crushed
- 400-450 ml. milk.
- Salt and pepper.
- Nutmeg
- Breadcrumbs (for coating)
- Egg (for coating)
Preparation
- In a frying pan or casserole, place the oil and butter over medium heat.
- In another saucepan we put the milk with the dried mushroom flour and heat it, keeping it warm until it is necessary to use it.
- When the butter has melted and starts to bubble we incorporate the onion and poach for 8 minutes.
- Then add the leek and sauté for 8 more minutes.
- Then add the mushrooms and fry until they take color.
- We add the flour and cook it for 1-2 minutes, stirring the whole.
- Season with salt and pepper and then we incorporate the milk Strain little by little, mixing after each addition and bringing to a boil again. Ideally, take this process in stride; the more we work the dough, the better it will be.
- We pour milk until you get a consistency such that when the spoon passes a groove opens and when you remove the more it is easily released from the walls. At that time, we correct the salt point, add nutmeg to the dough and mix to cook the dough for 1 more minute.
- We pour the table into a source and cover it with plastic wrap so that it touches the surface so that no crust forms. We let cool to room temperature for later take to the fridge all night.
- The next day we form balls with our hands and we pass them through breadcrumbs, egg and again breadcrumbs. If we are not going to fry them that day, we freeze them.
- We place the croquettes in a source (that fits in the freezer) so that they do not touch. Cover with plastic wrap and put in the freezer for a couple of hours. When they are frozen we can put them in a freezer bag without fear of them sticking to us. Thus, when we want to fry them we can remove the amount of croquettes we want from the bag without problems.
- Minutes before fry the croquettes we take them out. We fry them in small batches to keep the temperature constant.